Showing posts with label PTU. Show all posts

Monday, March 11, 2019

Unicorns Are Awesome PTU Tut

Supplies Needed:
PSP: I used PSP9, but any version should do.
 Kit of Choice: I used HPS Kit 22 2019 by Happy Pumpkin Studio. You can buy it here.
 Tube of Choice: I used a tube by Julia Fox. Please do not use without the proper license!
Mask of Choice: I used  Mask-1. I am not sure where I got this. If it belongs to you please let me know!
 Font of Choice: I used Unicorns Are Awesome. You can find it here.
Wordart by Me
(Just right click and save)
 
 
Let's get started!
 
New canvas 600X600
Copy & paste hpsK22frame (6) as a new layer
Resize 70%
Free rotate Left 15.00
Copy & paste hpsK22paper (2) as a new layer
Resize 45%
Move below Frame1
Free rotate Left 15.00
Select inside hpsK22frame (6) with magic wand
Selections Modify Expand by 5
On paper layer invert selection
Delete & deselect
Copy & paste tube
Resize as needed & place to right side of frame
Copy & paste wordart
Move to bottom Left of frame
Copy & paste hpsK22ele (4)
Resize 35%
Position to left behind frame
Erase any parts showing outside of frame
Lower opacity to 65%

Copy & paste desired elements
I used the following:

hpsK22ele (137) Resized 65%
Duplicate & Mirror
hpsK22ele (34)  Resized 45%
hpsK22ele (11)  Resized 45%
hpsK22ele (14)  Resized 25%
hpsK22ele (84) Resized 35%

Drop shadow where desired

Copy & paste paper of choice 
Apply mask & merge group
I resized mine 90% & added noise

Crop & resize if desired
Add name & copyright
Save as a .png & you're done!

Friday, August 8, 2014

Beach Life PTU Tut

Supplies Needed:
PSP: I used PSP9, but any version should do.
 Kit of Choice: I used Shellina by Irish Princess Designs. You can buy it here.
 Tube of Choice: I used a tube by PinUpToons. You can find it here. Please do not use without the proper license!
Template of Choice: I used  Temp176 by Amy & Leah. You can find it here.
Mask of Choice: I used  FM1 mask. I am not sure where I got this. If it belongs to you please let me know!
 Font of Choice: I used I used Surf Safari. You can find it here.
 
Let's get started!
 
 Open template
Shift+D to duplicate
Close original
Delete copyright layer
Canvas size 600X600
Replace each layer with paper or element of choice
I used the following:
words 1: adjust to #ecf2f0; inner bevel
words 1 back: adjust to #272823; DS
words 2:adjust to #ddddc4
words 2 back: adjust to #272823; DS
words 3: adjust to #7c9b99; select all, float, defloat & apply Eye Candy 5: glass (watery setting)
words 3 back: adjust to #272823; DS
1: IPD_Shellina_19; resize 35% & DS
2: IPD_Shellina_79; mirror, resize 35% & DS
3: IPD_Shellina_18; mirror, resize 35% & DS
4: IPD_Shellina_Paper3; adjust color to match words 3; apply eye candy gradient glow & DS
5: IPD_Shellina_Paper5; apply eye candy gradient glow & DS
6: IPD_Shellina_Paper4; apply blinds twice (horizontal & vertical); apply eye candy gradient glow & DS
7: IPD_Shellina_Paper7; adjust color to match words 3; apply eye candy gradient glow & DS

(C/P all elements as new layers)
IPD_Shellina_6: resize 35%, duplicate & mirror
IPD_Shellina_39: resize 55%, duplicate & merge down; flip, duplicate, mirror & merge down
IPD_Shellina_80: resize 45%, duplicate, mirror, merge down & resize 90%
IPD_Shellina_58: resize 70%
IPD_Shellina_74: resize 25%
IPD_Shellina_90: resize 25%
IPD_Shellina_70: resize 20%
IPD_Shellina_68: rsize 65%, duplicate & mirror
tube: resize if needed

Add DS where desired

C/P paper of choice as bottom layer
Apply mask & merge

Crop & resize
Add name & copyright
Save as .png & you're done!

I would love to see your results! If you would like to share just send them to me: sherenassweettreats@yahoo.com

Tuesday, July 29, 2014

Daisy Girl PTU Tut

Supplies Needed:
PSP: I used PSP9, but any version should do.
 Kit of Choice: I used Peace & Daisies by Scrappin Krazy Designs. You can find where to buy it here.
 Tube of Choice: I used a tube by Caron Vinson. You can find it here. Please do not use without the proper license!
Mask of Choice: I used  Vix_BigMask019. You can find it here.
 Font of Choice: I used I used Xiomara. You can find it here.
 
Let's get started!
 
New canvas 600X600
(C/P all elements as new layers)
ele60- resize 65%
select inside with magic wand
expand by 5
C/P paper of choice (I used p14) under frame layer
invert selection & delete
C/P close up of tube under frame layer
position & delete
deselect
change blend mode & opacity
C/P tube- resize if needed
place on left side of frame
ele46- resize 65%
duplicate & mirror
merge down
duplicate a few times & arrange
ele70- resize 35%
ele20- resize 35%& mirror
ele45- resize 30%
ele02- resize 35% & free rotate right 15
ele21- resize 65% & mirror
duplicate & mirror

Add DS

C/P paper of choice (I used p09)
apply mask & merge
resize 90%
 
Crop & resize
Add name & copyright
Save as .png & you're done!

I would love to see your results! If you would like to share just send them to me: sherenassweettreats@yahoo.com

Tuesday, March 11, 2014

Sweet PTU Tut

Supplies Needed:
PSP: I used PSP9, but any version should do.
 Kit of Choice: I used So Bitter Sweet by Sam's Scraps. You can buy it here.
 Tube of Choice: I used Snow Angel by Verymany. You can  find it here. Please do not use without the proper license!
Mask of Choice: I used WSL_Mask84 here.
  Font of Choice: I used I used Xiomara. You can find it here.
Let's get started!
 New canvas 600X600
C/P 3LH12 - SBS Frame 5
Resize 45%
Select inside with magic wand
Expand by 3
C/P paper of choice under frame layer
(I used 3LH12 - SBS Paper 18)
Invert selection, delete & deselect
C/P closeup tube above paper
Resize if needed & arrange inside frame
Erase any parts showing outside of frame
Change blend mode to Luminance(Legacy) & opacity to 45
DS frame & merge visible
Move to left
C/P tube
Resize if needed (I resized & mirrored mine.)
DS tube

To make the rug:
Select the Ellipse Tool
Mode: Draw Ellipse
Foreground: Null Background: any color
Draw out an oval the size you want your rug
Horizontal center & Convert to Raster
Apply Eye Candy 5:Textures Animal Fur
Settings- Dalmation, Low Coverage
Pattern- Base Color: #ffcddc Spot Color: #ffcddc
Leave everything else the same


C/P elements of choice
I used the following:
3LH12 - SBS chocolates: resize 25%
3LH12 - SBS present: resize 45%
3LH12 - SBS plush bunny: resize 35%
3LH12 - SBS string: resize 45%
3LH12 - SBS flower 8: resize 10%
3LH12 - SBS flower 1: resize 15%; duplicate & mirror
3LH12 - SBS cocktail glass: resize 25%

DS elements

C/P paper of choice (I used 3LH12 - SBS Paper 13.)
Apply mask & merge group
Mirror

Crop & resize
Add name & copyright
Save as .png & you're done!
I would love to see your results! If you would like to share just send them to me: sherenassweettreats@yahoo.com

Wonderland PTU Tut

Supplies Needed:
PSP: I used PSP9, but any version should do.
 Kit of Choice: I used Wonderland by Scrappin Krazy Designs. You can find where to buy it here.
 Tube of Choice: I used a tube by Suzanne Woolcott. She is no longer selling so just use whatever you have. Please do not use without the proper license!
 Font of Choice: I used I used Alice in Wondrland. You can find it here.
 
Let's get started!
 
 New canvas 600X600
C/P ele80
Resize 60%
Select inside with magic wand
Expand by 3
C/P paper of choice below frame layer (I used p18)
Invert selection, delete & deselect
C/P tube
Resize if needed
Duplicate; on duplicate Gaussian Blur 3 & change blend mode to Soft Light
DS original tube
Place at bottom left of frame

C/P elements of choice
I used the following:
ele56-arrange, duplicate & mirror; merge together
ele50
ele116- resize 25%
ele123- resize 45%
ele01- resize 65%; duplicate & mirror
ele104- resize 35%
ele130- resize 35%
ele63- resize 30%
ele25- resize 75%

Add DS where desired

Crop & resize
Add name & copyright
Save as .png & you're done!
I would love to see your results! If you would like to share just send them to me: sherenassweettreats@yahoo.com

Oh So Cute PTU Tut

Supplies Needed:
PSP: I used PSP9, but any version should do.
 Kit of Choice: I used Cutie Kei by Gimptastic Scraps. You can find where to buy it here.
 Tube of Choice: I used the tube that inspired the kit by Cute Loot. You can  find it here. Please do not use without the proper license!
 Font of Choice: I used I used LoveNess Two. You can find it here.
Rug made by me


Let's get started!
 
New canvas 600X600
C/P Frame6
Select inside with magic wand
Expand by 3
C/P paper of choice under frame layer (I used Paper6.)
Invert selection & delete
C/P tube & arrange under frame
Delete & deselect
Change blend mode & opacity
C/P tube
Resize if needed
Mirror & place to left of frame

C/P elements of choice
I used the following:
Rug
Table- resize 45%
Boombox- resize 40%
Tapes- resize 40%
Bag- resize 40%
Sunglasses- resize 40%
StarSwirl- resize 75%; duplicate, flip & mirror
Present- resize 40%
Bear- resize 45%
Halftone- resize 65%; Gaussian Blur 5; Mosaic: Glass Default settings; move below stars

Add DS where desired

Crop & resize

Add name, words & copyright
Save as .png & you're done!

I would love to see your results! If you would like to share just send them to me: sherenassweettreats@yahoo.com

Thursday, February 6, 2014

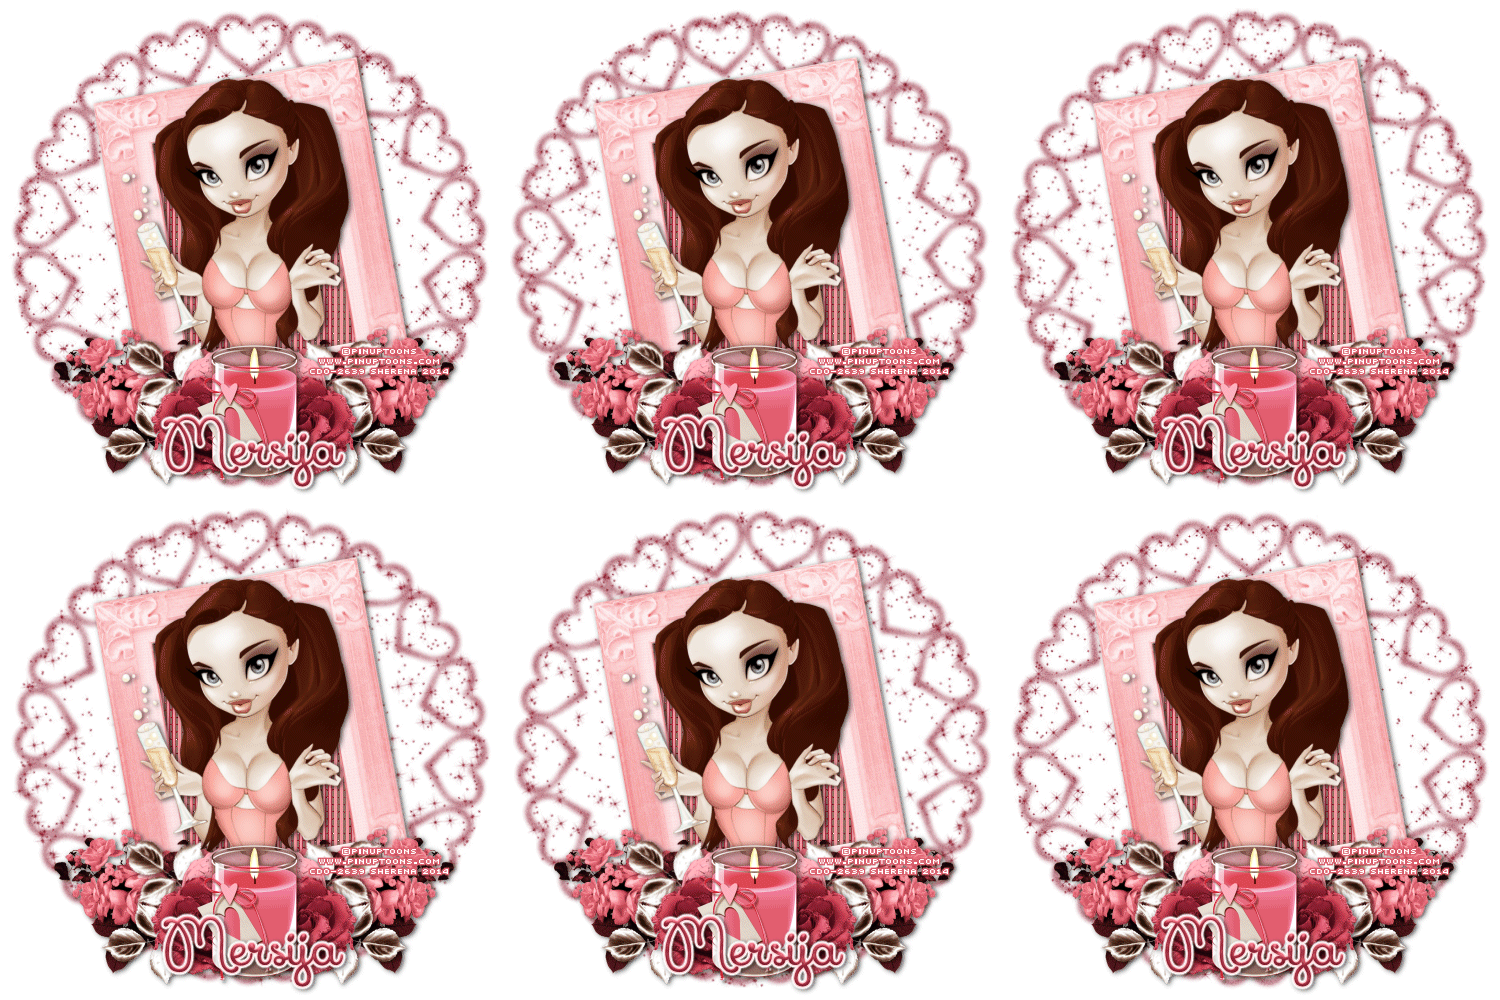
Be Mine PTU Tut

Supplies Needed:
PSP: I used PSP9, but any version should do.
 Kit of Choice: I used  Be Mine by Mersija's Majestic Design. You can find where to buy it here.She also has a mini kit by the same name.
 Tube of Choice: I used a tube by PinUp Toons. You can  find it here. Please do not use without the proper license!
Mask of Choice: I used Suz heartmask2 here.
 Font of Choice: I used I used Xiomara. You can find it here.
Animation Shop
 
Let's get started!
 
New canvas 600X600
C/P MMD_BeMine_frame2- resize 10%; free rotate left 10
Select inside with magic wand
Expand by 5
Add new layer below frame layer
C/P paper of choice into selection
Deselect
C/P tube
Resize if needed
Erase any parts showing at bottom of frame

C/P elements of choice
I used the following:
MMD_BeMine_flowers bunch1- resize 35%; duplicate & mirror
MMD_BeMine_leaves1- resize 10%; erase the top leaves; duplicate, flip & arrange using raster deform tool; merge down; duplicate & mirror
MMD_BeMine_rose glitter- resize 25%; duplicate & mirror
MMD_BeMine_rose2- resize 7%; duplicate & mirror
MMD_BeMine_candle- resize 10%

Add DS

Add new layer above background layer
Floodfill with color of choice
Add noise
Apply mask & merge group
Resize 85%, duplicate & merge down

Crop & resize
Add name & copyright

To animate:
1. Hide the background & mask layers
2. Merge visible
3. Hide merged layer & unhide background layer
4. Copy merged & paste into Animation Shop (AS)
6. Back in PSP, unhide mask & select
7. Copy & paste as a new animation in AS
8. Paste after current selection so you have 2 mask layers
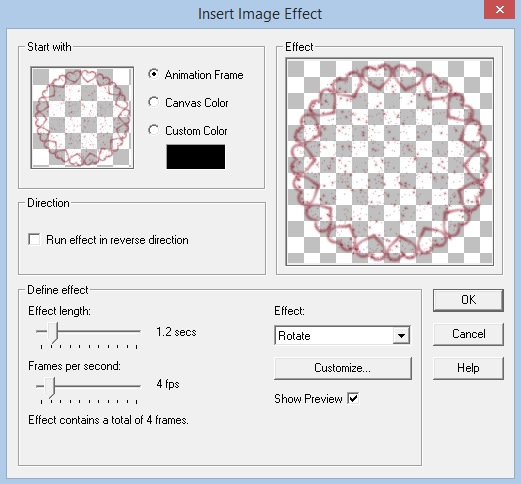
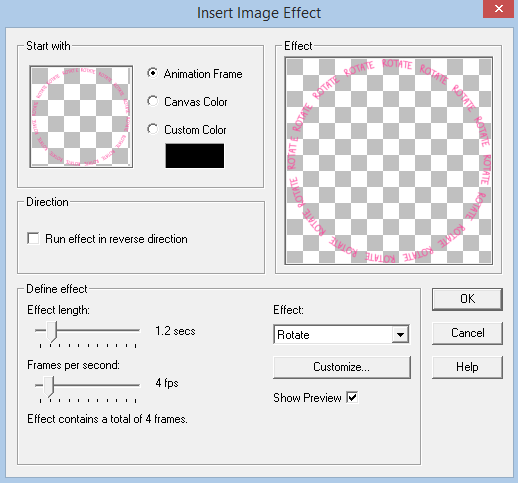
9. Select frame 1 of the mask layers & insert image transition with these settings:

 
You should now have 6 mask layers
10. On your first animation (mask) Copy & paste after selected frame until you have 6 frames
11. On mask animation, Select All & Copy
12. Back on background animation, Select All & Paste into current selection
13. Back in PSP, hide everything but the top merged layer
14. Copy merged & paste in AS as a new animation
15. Paste after current selection until you have 6 frames
16. Select All & Copy
17. Back on original animation, Select All & Paste into current selection
18. Change frame properties to 20
19. View animation & save

I would love to see your results! If you would like to share just send them to me: sherenassweettreats@yahoo.com

Love is Red PTU Tut

Supplies Needed:
PSP: I used PSP9, but any version should do.
 Kit of Choice: I used  by Scrappin Krazy Designs. You can find where to buy it here.
 Tube of Choice: I used Snow Angel by Verymany. You can  find it here. Please do not use without the proper license!
Mask of Choice: I used WSL_Mask84 here.
 Font of Choice: I used I used Saginaw. You can find it here.
 
Let's get started!
 
New canvas 600X600
C/P ele51 Resize 60%
Select inside with magic wand
Expand by 3
C/P paper of choice (I used p09)
Invert selection, delete & deselect
C/P tube
Resize if needed
I also mirrored mine
C/P closeup under frame
Resize if needed
Erase any parts outside of frame
Change blend mode & opacity

C/P elements of choice
I used the following:
ele18- duplicated a few times & arranged
ele09- resize 35%
ele05- resize 25%
ele50- resize 35% & duplicate
ele37- resize 35%
ele20- resize 25%
ele02- resize 20%

Add DS

C/P paper of choice (I used p13)
Apply mask & merge group
Use Raster Deform tool to adjust
 
Crop & resize
Add name & copyright
Save as .png & you're done!

I would love to see your results! If you would like to share just send them to me: sherenassweettreats@yahoo.com

Wednesday, February 5, 2014

Cupid PTU Tut

Supplies Needed:
PSP: I used PSP9, but any version should do.
 Kit of Choice: I used Candy Hearts Tagger by QueenBrat Designs. You can find it here.
 Tube of Choice: I used a tube that came with the kit. Please do not use without the proper license!
Mask Of Choice: I used Vix-Val2012Mask3 here.
 Font of Choice: I used LoveNess Two here.
(Optional) Eye Candy 5: Textures
 
Let's get started!
 
New canvas 600X600
Select your rectangle tool
Forground: #561265 Background: Null
Line Style: Solid Width: 15
Objects-Align-Center in Canvas
Convert to Raster
Inner Bevel with favorite settings
Select inside frame with magic wand
Expand by 3
C/P paper of choice (I used QBD_CandyHearts_paper19)
Invert Selection, delete & deselect

To make the rug:
Select the Ellipse Tool
Mode: Draw Ellipse
Foreground: Null Background: #b487c2
Draw out an oval the size you want your rug
Horizontal center & Convert to Raster
Apply Eye Candy 5:Textures Animal Fur
Settings- Dalmation, Low Coverage
Pattern- Base Color: #b487c2 Spot Color: #000000
Leave everything else the same

C/P tube Resize if needed

C/P elements of choice
I used the following:
QBD_CandyHearts_ConversationHeartChain01- resize 35%; erase any parts

showing outside of frame
QBD_CandyHearts_Bow04- resize 20%; free rotate left 20
QBD_CandyHearts_CupidsBow01- resize 30%
QBD_CandyHearts_Arrows01- resize 30%
QBD_CandyHearts_BagofArrows01- resize 30%
QBD_CandyHearts_bear02- resize 30%

Add DS

C/P paper of choice (I used )
Apply mask & merge group
Resize 85%

Crop & resize
Add name & copyright
Save as .png & you're done!

I would love to see your results! If you would like to share just send them to me: sherenassweettreats@yahoo.com

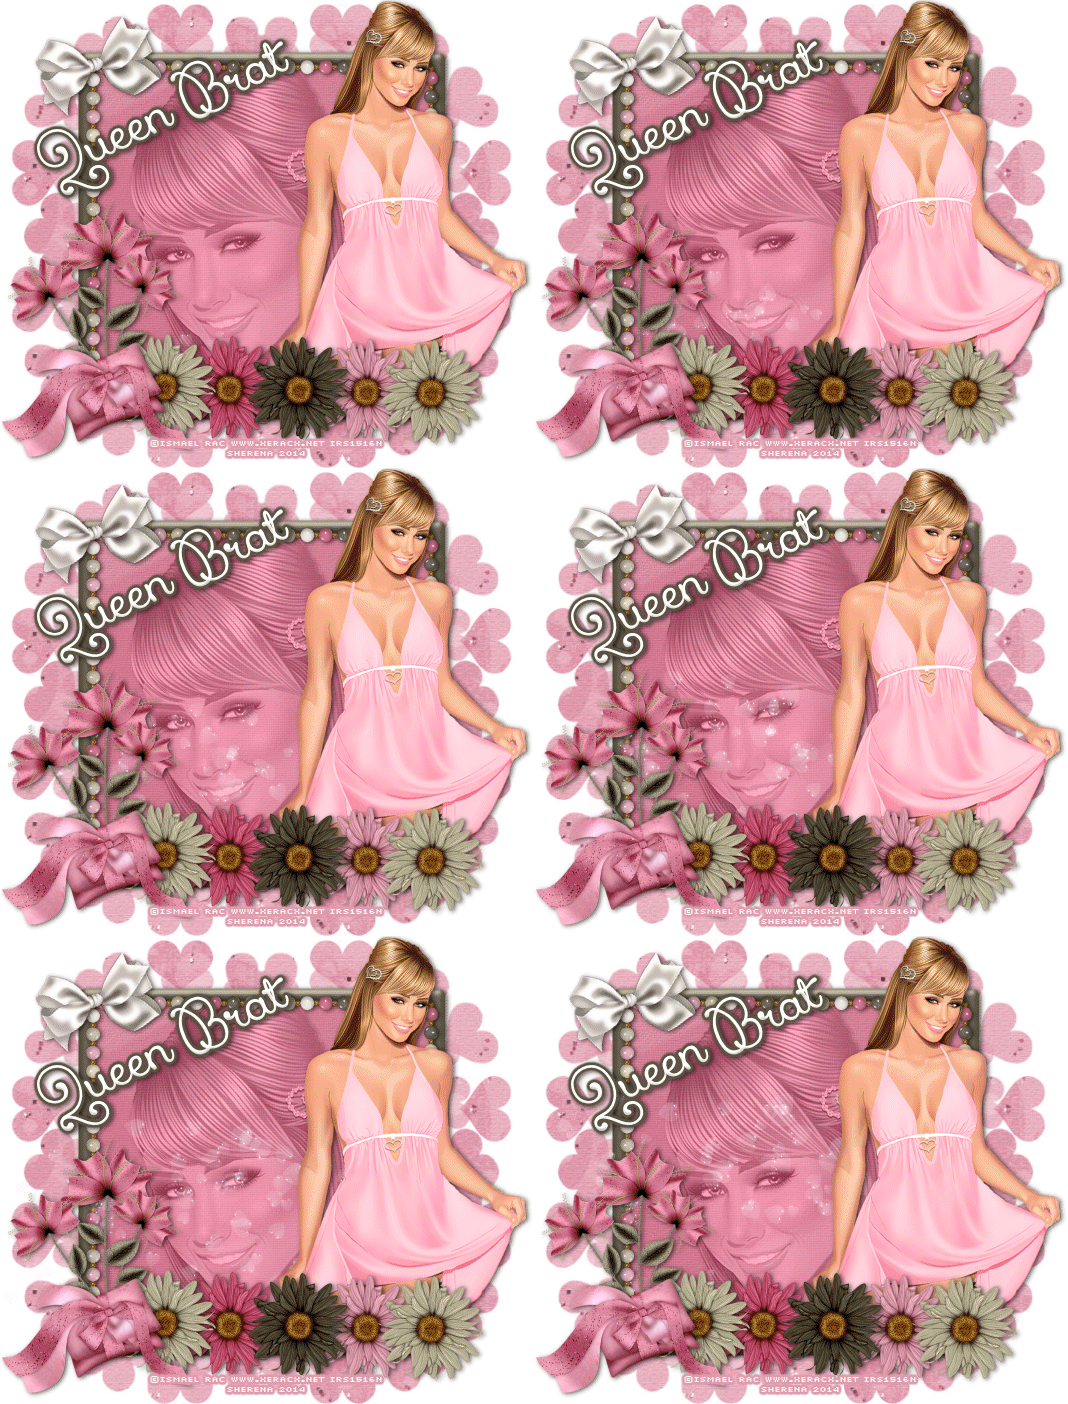
Friday, January 24, 2014

Crazy Lil Thing PTU Tut

Supplies Needed:
PSP: I used PSP9, but any version should do.
 Kit of Choice: I used My Dotty Valentine by Gimptastic Scraps. You can find where to buy it here.
 Tube of Choice: I used a tube by Ismael Rac. You can  find it here. Please do not use without the proper license!
 Font of Choice: I used I used Sacramento. You can find it here.
 
Let's get started!

New canvas 600X600
C/P Frame1
Resize 65%
Select inside with magic wand
Expand by 3
C/P paper of choice under frame (I used Paper3)
Invert selection, delete & deselect
C/P tube
Resize if needed
DS frame & tube

C/P elements of choice
I used the following:
Love- resize 80% & move to left; duplicate & move to right; merge together
Scatter- resize 75%, duplicate & mirror; merge together
Heart1- flip
Cupid- resize 45% & mirror
Telephone- resize 55%
HeartCandies- resize 35%, duplicate & mirror
Present- resize 45%
Rose- move to left, duplicate & mirror
Lips- resize 45% & add noise

DS elements

Crop & resize
Add name, copyright & words of choice
Save as .png & you're done!

I would love to see your results! If you would like to share just send them to me: sherenassweettreats@yahoo.com

Thursday, January 23, 2014

A Lil Romance PTU Tut

Supplies Needed:
PSP: I used PSP9, but any version should do.
 Kit of Choice: I used A Lil Romance by QueenBrat Designs. You can find it here.
 Tube of Choice: I used a tube by Ismael Rac. You can  find it here. Please do not use without the proper license!
Mask of Choice: I used SST- Mask13 here.
 Font of Choice: I used I used Xiomara. You can find it here.
(Optional)
Animation Shop
Heart Animation here
 
Let's get started!
 
  New canvas 600X600
Select the rectangle tool with theses settings:
Mode: Draw Square
Show Nodes & Create on Vector checked
Horizontal & Vertical Radius: 0
Line Style: +Solid
Width: 15
Anti-Alias checked
Set foreground to color from kit & background null
Center & convert to raster
Add Inner Bevel
Select inside with magic wand
Expand by 5
C/P paper of choice (I used QBD_ALilRomance_paper18)
Invert selection & delete
C/P closeup
Delete & deselect
Adjust blend mode & opacity of tube
C/P tube Resize if needed
Mirror & move to right of frame
I erased the bottom of my tube so she appears to be coming out of the frame

C/P elements of choice
I used the following:
QBD_ALilRomance_frame07- resize 40%
QBD_ALilRomance_pillow01- resize 35%
QBD_ALilRomance_butterfly04- resize 25%
QBD_ALilRomance_flower04- resize 20%
QBD_ALilRomance_flower05- resize 20%
QBD_ALilRomance_flower06- resize 20%
QBD_ALilRomance_flower07- resize 20% & duplicate
QBD_ALilRomance_bow09- resize 35% & free rotate left 20
QBD_ALilRomance_flowerspray02- resize 35%

DS elements & tubes

C/P paper of choice (I used QBD_ALilRomance_paper08)
Apply mask & merge group
Resize 95%

Crop & resize
Add name & copyright
 
 To animate:
Hide everything but mask, frames, paper, closeup & bow
Copy merged & paste as new animation in Animation Shop
Open your animation in AS to see how many frames you need
Mine has 16 frames
On your new animation C/P until you have the same number frames as your animation
Select all
On the animation you are using select all & copy
Back on your animation paste into selection
Back in PSP, hide current layers & unhide everything else
Copy merged & paste in AS as new animation
C/P until you have the same number of frames
Select all & copy
Paste into selection on first animation
View animation & save
 
I would love to see your results! If you would like to share just send them to me: sherenassweettreats@yahoo.com 

Monday, January 13, 2014

Teacher's Aide PTU Tut

Supplies Needed:
PSP: I used PSP9, but any version should do.
 Kit of Choice: I used Hot & Nerdy by Gimptastic Scraps. You can find where to buy it here.
 Tube of Choice: I used a tube by Ismael Rac. You can  find it here. Please do not use without the proper license!
Mask of Choice: I used Mask27 here.
 Font of Choice: I used I used KBJellybean. You can find it here.
Let's get started!
 New canvas 600X600
C/P Frame3 Resize
Select inside with magic wand
Expand by 3
C/P paper of choice below frame (I used Paper7)
Invert selection & delete
Deselect
C/P closeup tube
Mirror
Erase any parts showing outside of frame
Change blend mode & opacity
C/P tube Resize if needed

C/P elements of choice resizing as needed
I used the following:
TeachersAide
Scatter- duplicated a few times & arrange
Ribbon- mirrored
Protractor
Pencil
Locker
Glasses
CompBook
Chalkboard
Books
Backpack
Apple
Doily

DS tube & elements

C/P paper of choice (I used Paper2)
Apply mask & merge group

Crop & resize
Add name & copyright
Save as .png & you're done!

I would love to see your results! If you would like to share just send them to me: sherenassweettreats@yahoo.com

Friday, January 10, 2014

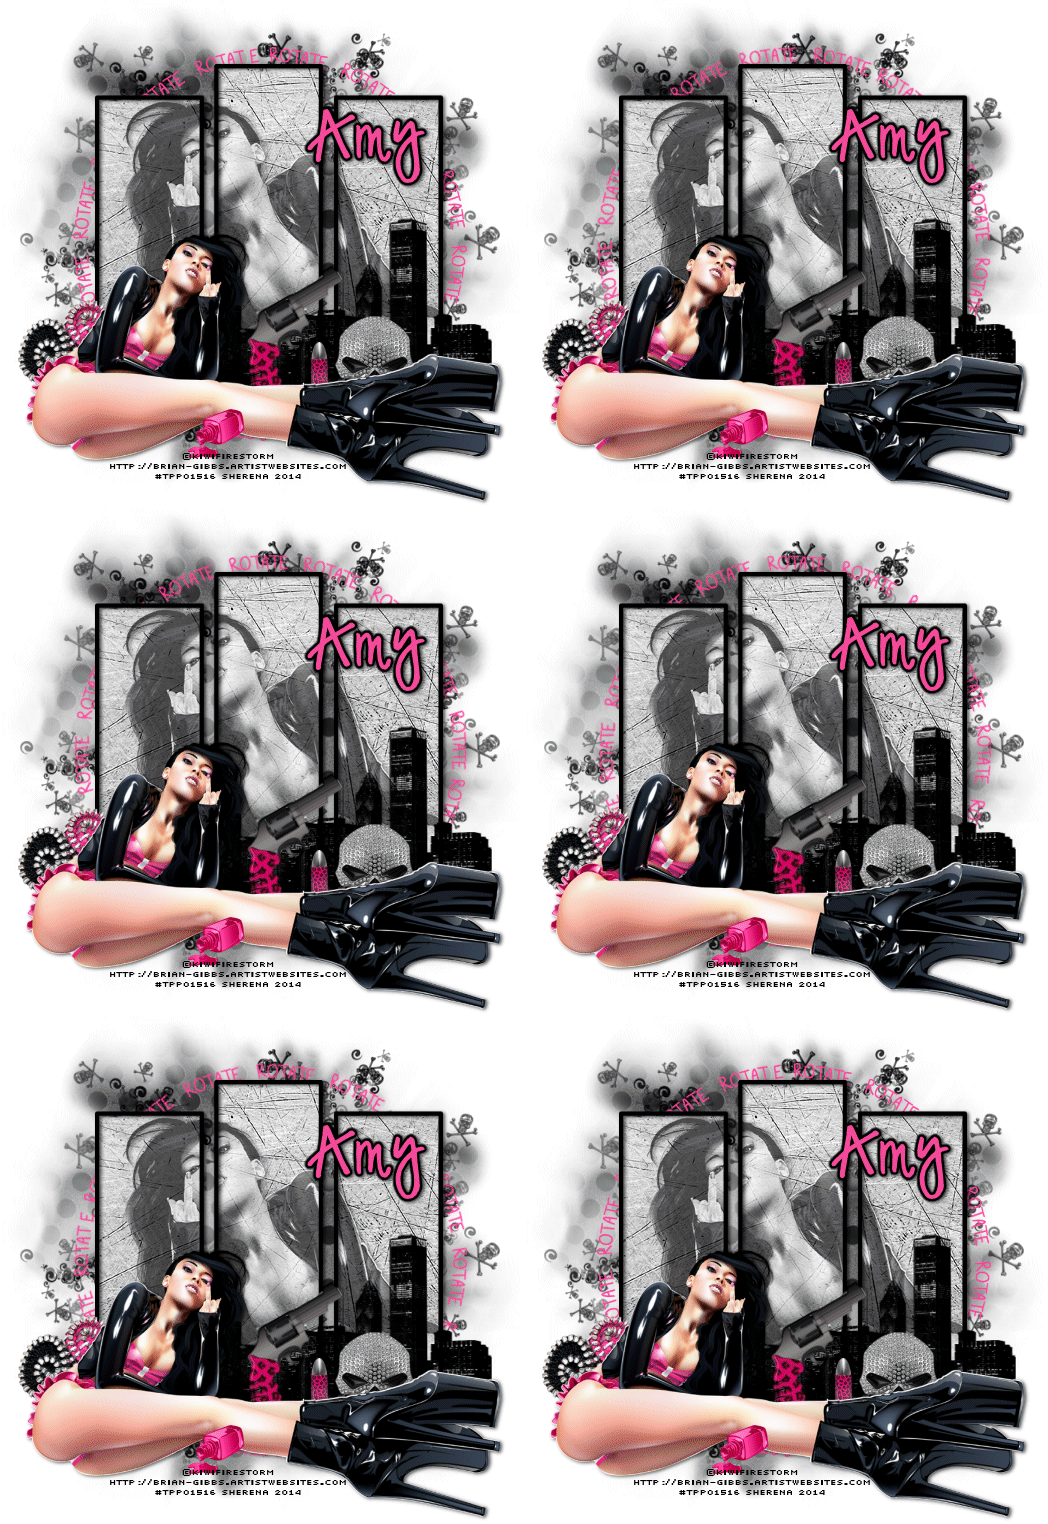
Rotate PTU Tut

Supplies Needed:
PSP: I used PSP9, but any version should do.
 Kit of Choice: I used Rotate by Gimptastic Scraps. You can find where to buy it here.
 Tube of Choice: I used the matching tube by KiwiFireStorm. You can  find it here. Please do not use without the proper license!
Mask of Choice: I used Mask16-Leah here.
 Font of Choice: I used I used Digs My Hart. You can find it here.
Animation Shop
 
Let's get started!
 
New canvas 600X600
C/P Frame5
Resize 65% & free rotate left 90
Select inside frames with magic wand
Expand by 3
C/P paper of choice (I used Paper6)
Invert Selection & delete
C/P tube
Position & delete
Deselect
Change blend mode to Luminance(L) & opacity to 65%
C/P tube
Resize if needed & mirror

C/P elements of choice
I used the following:
Cityscape- resize 65%
ZippedHeart- resize 65%
Gun- resize 45% & free rotate left 45
Bullet- resize 25%
Nailpolish- resize 25%
SkullScatter- resize 80%
Skull1- resize 45%
WA- resize 65% & recolor

C/P paper of choice (I used Paper5)
Apply mask & merge group
Resize 90%

Crop & resize now
Add name & copyright

To animate:
1. Hide the background, mask, skullscatter & WA layers
2. Merge visible
3. Hide merged layer & unhide background, mask & skullscatter layers
4. Merge visible
5. Copy merged & paste into Animation Shop (AS)
6. Back in PSP, unhide WA & select
7. Copy & paste as a new animation in AS
8. Paste after current selection so you have 2 WA layers
9. Select frame 1 of the WA layers & insert image transition with these settings:
 
You should now have 6 WA layers
10. On your first animation (mask) Copy & paste after selected frame until you have 6 frames
11. On WA animation, Select All & Copy
12. Back on mask animation, Select All & Paste into current selection
13. Back in PSP, hide everything but the top merged layer
14. Copy merged & paste in AS as a new animation
15. Paste after current selection until you have 6 frames
16. Select All & Copy
17. Back on mask animation, Select All & Paste into current selection
18. Change frame properties to 25
19. View animation & save


I would love to see your results! If you would like to share just send them to me: sherenassweettreats@yahoo.com

Thursday, January 9, 2014

The Best Is Yet to Come PTU Tut

Supplies Needed:
PSP: I used PSP9, but any version should do.
 Kit of Choice: I used  The Best is Yet to Come by Mersija's Majestic Design. You can find where to buy it here.She also has a mini kit by the same name.
 Tube of Choice: I used an exclusive tube from Pics for Design. You can  find it here. Please do not use without the proper license!
Mask of Choice: I used BD Mask Set 6-44 here.
 Font of Choice: I used I used A Gentle Touch. You can find it here.
Plugins: DSB Flux Bright Noise
Animation Shop
 
Let's get started!
 
New canvas 600X600
C/P MMD_TBIYTC_ScallopedFrame
Resize 35%
Select inside frame with magic wand
Expand by 5
C/P paper of choice under frame
(I used LMMD_TBIYTC_paper stars resized 17%)
Invert selection & delete
Deselect
C/P tube
Resize if needed

Add elements of choice
I used the following:
LMMD_TBIYTC_branch teal- resize 15%; duplicate & mirror
LMMD_TBIYTC_branch gold 2- resize 20%; duplicate & mirror
MMD_TBIYTC_NewYearsBox- resize 7%; duplicate & mirror
LMMD_TBIYTC_ flower rose gold- resize 10%
LMMD_TBIYTC_ flower teal- resize 20%; duplicate & mirror
LMMD_TBIYTC_ leaf silver- resize 10% & mirror; duplicate & flip; merge down;

duplicate & mirror

Add DS
Erase any part of tube that shows below elements

Add a new layer above the background layer
Select all
C/P paper of choice into selection
(I used LMMD_TBIYTC_paper)
Deselect
Apply mask & merge group
Resize 90%

Crop & resize
Add copyright & name

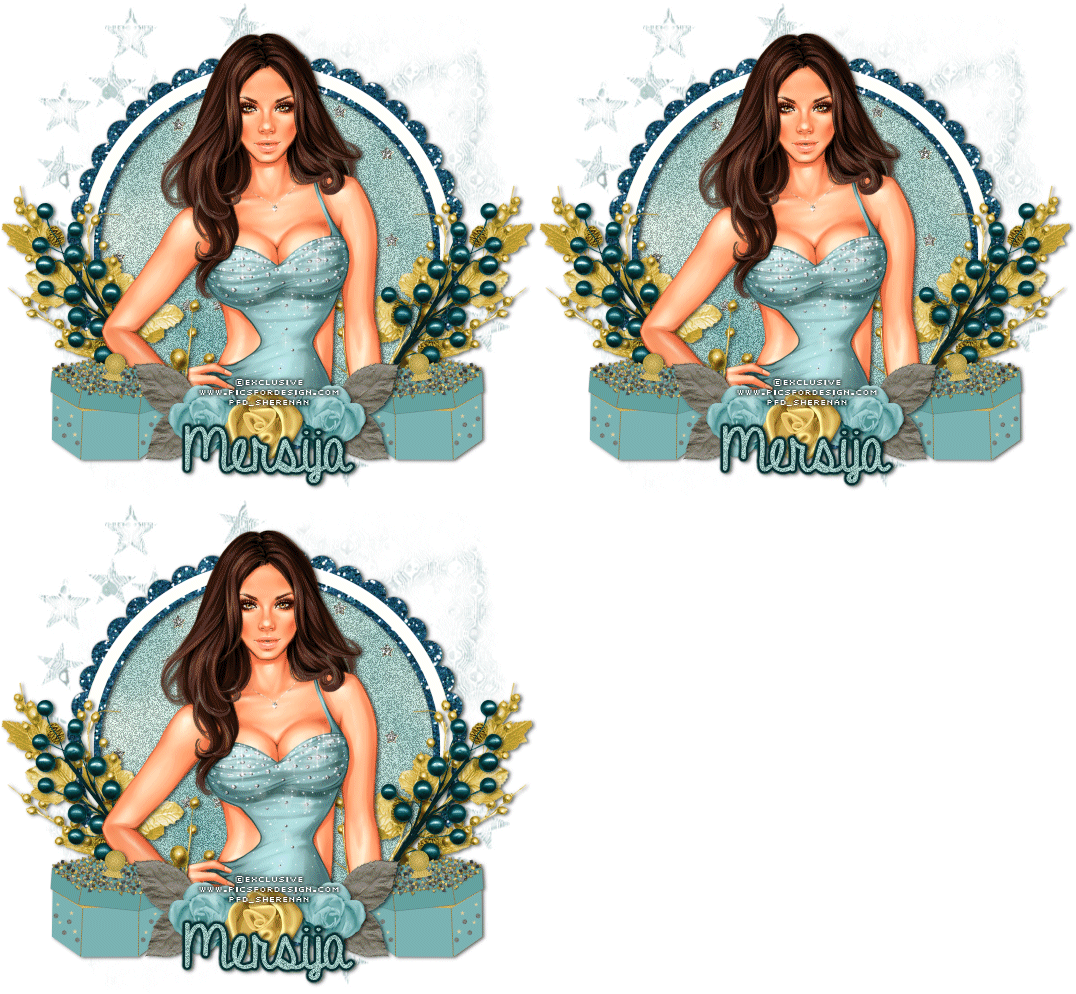
To Animate:
1. Select your frame background (Mine is the blue circle)
2. Apply DSB Flux Bright Noise 36 Mix
    Optional: apply to the name also
3. Copy merged & paste into Animation Shop (AS)
4. Back in PSP undo DSB Flux Bright Noise
5. On frame background (& name) apply DSB Flux Bright Noise with the same setting, but click mix once before applying
6. Copy merged & paste after selected frame in AS
7. Repeat steps 4-6
8. View animation & adjust frame properties if needed
    Once you are happy with your animation save

Iced Fantasy PTU Tut

Supplies Needed:
PSP: I used PSP9, but any version should do.
 Kit of Choice: I used Iced Fantasy by Tasha's Playground. You can buy it here.
 Tube of Choice: I used Snow Angel by Verymany. You can  find it here. Please do not use without the proper license!
Mask of Choice: I used DD_AssortedMask_6 here.
  Font of Choice: I used I used Xiomara. You can find it here.
Let's get started!
 New canvas 600X600
C/P frame3
Resize 65%
Select inside with magic wand
Expand by 5
C/P paper of choice below frame
(I used paper6)
Invert selection & delete
C/P closeup tube below frame
Resize if needed
Delete & deselect
Adjust blend mode & opacity
DS closeup tube & frame
Merge visible & move to left
C/P tube
Resize if needed & mirror
C/P fairy wing below tube
Resize 80% & free rotate right 15
Duplicate & Mirror
Arrange so wings look like they are coming out the back of tube
Hide everything but tube & wings
Merge visible & DS

C/P elements of choice
I used the following:
beads- resize 75%
butterfly- resize 45%
bottle- resize 45%
candle- resize 35%
chest- resize 35%
flower3- resize 35%, duplicate & mirror
lantern- resize 45%

Add DS

C/P paper of choice as bottom layer
(I used paper7)
Apply mask & merge group


Crop & resize
Add name & copyright
Save as .png & you're done!

I would love to see your results! If you would like to share just send them to me: sherenassweettreats@yahoo.com

Tuesday, January 7, 2014

My Love PTU Tut

Supplies Needed:
PSP: I used PSP9, but any version should do.
 Kit of Choice: I used My Love by CakiePotPie Designs. You can find where to buy it here.
 Tube of Choice: I used Snow Angel by Verymany. You can  find it here. Please do not use without the proper license!
Mask of Choice: I used WSL_Mask84 here.
 Font of Choice: I used I used Great Vibes. You can find it here.
 
Let's get started!
 
 New canvas 600X600
C/P CPP_ML_Frame
Resize 45%
Select inside frame with magic wand
Expand by 5
C/P paper of choice below frame
(I used CPP_ML_Paper3)
Invert selection & Delete
C/P closeup
Arrange under frame
Delete & Deselect
Adjust blend mode & opacity
C/P tube
Resize if needed

C/P elements of choice
I used the following:
CPP_ML_Chest- resize 35%
CPP_ML_Clock- resize 15%
CPP_ML_Books- resize 35%
CPP_ML_Pillow- resize 35%
CPP_ML_Rose- resize 15%
CPP_ML_Foliage- resize 15%, free rotate right 90 & erase any parts showing to left of rose
CPP_ML_Flower4- resize 25%
CPP_ML_Vine- resize 40% & flip
CPP_ML_Charm- resize 70%

Add DS

C/P paper of choice
(I used CPP_ML_Paper2)
Apply mask & merge group
Resize 90%

Crop & resize
Add name & copyright
Save as .png & you're done!

I would love to see your results! If you would like to share just send them to me: sherenassweettreats@yahoo.com

Winter Angel PTU Tut

Supplies Needed:
PSP: I used PSP9, but any version should do.
 Kit of Choice: I used Winter Angel by Scrappin Krazy Designs. You can find where to buy it here.
 Tube of Choice: I used Snow Angel by Verymany. You can  find it here. Please do not use without the proper license!
Mask of Choice: I used Vix_Mask8Christmas2010 here.
 Font of Choice: I used I used Xiomara. You can find it here.
 
Let's get started!
 
 New canvas 600X600
C/P frame2 as a new layer
Resize 75%
Select inside frame with magic wand
Expand by 5
C/P paper of choice as a new layer under frame
(I used p09 resized 45%)
Invert selection & delete
Deselect
C/P tube
Resize if needed
C/P closeup of tube behind frame
Resize if needed
Erase any parts showing outside of frame
Change blend mode to Luminance(L) & opacity to 65%

C/P elements of choice
I used the following:
angels- resize 45%
flower6- resize 45%
flower2- resize 45%
flower1- resize 45% & duplicate
berries- resize 65%, duplicate & mirror
snowflake1- resize 32% & duplicate 2x
snowflake3- resize 30%; duplicate & resize 75%
 
Add DS

C/P paper of choice
(I used p13)
Apply mask & merge group
Resize 90%
Add noise

Crop & resize
Add name & copyright
Save as .png & you're done!

I would love to see your results! If you would like to share just send them to me: sherenassweettreats@yahoo.com

Angelic Winter PTU Tut

Supplies Needed:
PSP: I used PSP9, but any version should do.
 Kit of Choice: I used Angelic Winter by Mersija's Majestic Design. You can find where to buy it here.
 Tube of Choice: I used the adorable angel that came with the kit.
 Font of Choice: I used I used Xiomara. You can find it here.
Plugins: VDL Snowflake here
Animation Shop
 
Let's get started!
 
 Invert selection & delete
Invert selection DO NOT DESELECT
Add 3 new layers above paper layer & name it snow 1, snow 2 & snow 3
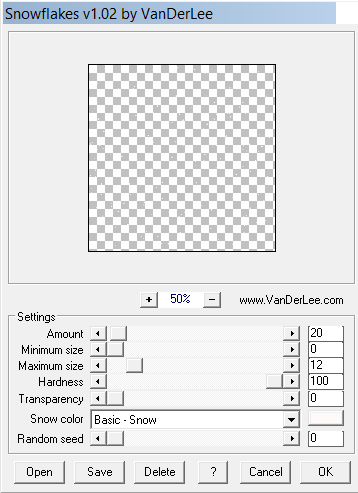
On snow 1: VanderLee Snowflakes with these settings:


On snow 2: VanderLee Snowflakes with these settings:
 
 
On snow 3: VanderLee Snowflakes with these settings:
 
Deselect

Add elements of choice
I used the following:
MMD_angel flying (2)- resize 15%
MMD_flower pink gray1- resize 12%; duplicate & resize 80%
MMD_Branch 3- resize 45%; free rotate left 10; duplicate & mirror
MMD_Branch 2- resize 45%; Mirror & free rotate right 10; duplicate & mirror
MMD_cocoa1- resize 6%
MMD_frame- resize 75%

Add DS where desired

Crop & resize
Add name & copyright

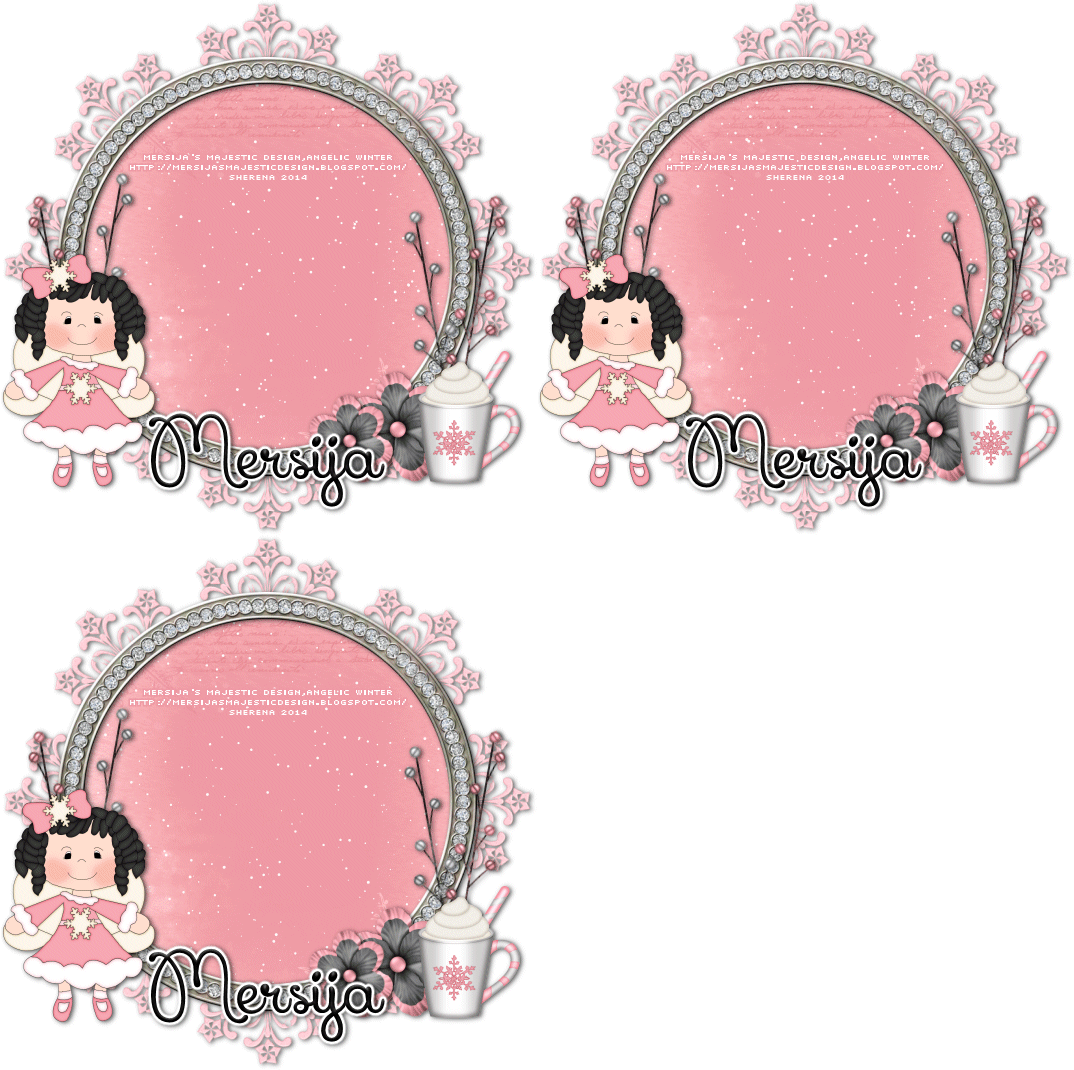
To animate:
Hide snow 2 & snow 3
Copy merged & paste in Animation Shop
Back in PSP, hide snow 1 & unhide snow 2
Copy merged & paste after current frame in Animation Shop
Back in PSP, hide snow 2 & unhide snow 3
Copy merged & paste after current frame in Animation Shop
In Animation Shop, select all & change frame properties to 20
View animation & save if happy

I would love to see your results! If you would like to share just send them to me: sherenassweettreats@yahoo.com 

Wednesday, January 1, 2014

Party Girl PTU Tut

Supplies Needed:
PSP: I used PSP9, but any version should do.
 Kit of Choice: I used 3,2,1...Happy New Year by Scrappin Krazy Designs. You can find where to buy it here.
 Tube of Choice: I used an exclusive tube from Pics for Design. You can  find it here. Please do not use without the proper license!
 Font of Choice: I used I used Xiomara. You can find it here.
   
Let's get started!
 
New canvas 600X600
C/P ele31 Resize 65%
Select inside each frame Expand by 3 & C/P papers of choice behind frames
(I used p04, p05, p10 & p11)
C/P your tube inside each frame Resize if needed
Erase any parts showing outside of frame
Change the blend mode & opacity on each tube
C/P tube to left of frame Resize if needed

C/P elements of choice
I used the following:
ele10- free rotate right 90, duplicate & flip
ele24- resize 45%
ele56- resize 45%
ele46- resize 45%
ele58- resize 45%
ele12- duplicate & flip

Add DS
 
Crop & resize
Add name & copyright
Save as .png & you're done!

I would love to see your results! If you would like to share just send them to me: sherenassweettreats@yahoo.com

Candy Girl PTU Tut

Supplies Needed:
PSP: I used PSP9, but any version should do.
 Kit of Choice: I used Candy Girl by Gimptastic Scraps.You can find where to buy it here.
 Tube of Choice: I used a tube by Ismael Rac. It was a bonus tube. You can buy his tubes here. Please do not use without the proper license!
Mask of Choice: I used  Mask15-Leah here.
 Font of Choice: I used Syncopate. You can get it here.
 
Let's get started!
 
New canvas 600X600
C/P Frame3 Resize 65%
Select inside frame with magic wand
Expand by 5
C/P paper of choice under frame (I used Paper10)
Invert selection & Delete
Deselect
C/P tube Resize if needed
Erase part of the tube showing on left side of frame so she appears to be "popping" out of the frame

C/P elements of choice
I used the following:
WA2- resize 75%
Teddy- resize 65%
Ribbon- resize  65%; free rotate right 90
Sundae2- resize 65%
Cupcake- resize 45%
Chocolate- resize 45%
Candy2- resize 45%
CandyRing- resize 45%
Candy3- resize 45%
WrappedCandy- resize 45%
Candy1- resize 45%

Add DS where desired

C/P paper of choice above background layer (I used Paper8)
Apply mask & merge group
Resize 90%

Crop & Resize
Add name, wordart & copyright
Save as .png & you're done!

I would love to see your results! If you would like to share just send them to me: sherenassweettreats@yahoo.com