Friday, August 8, 2014

Beach Life PTU Tut

Supplies Needed:
PSP: I used PSP9, but any version should do.
 Kit of Choice: I used Shellina by Irish Princess Designs. You can buy it here.
 Tube of Choice: I used a tube by PinUpToons. You can find it here. Please do not use without the proper license!
Template of Choice: I used  Temp176 by Amy & Leah. You can find it here.
Mask of Choice: I used  FM1 mask. I am not sure where I got this. If it belongs to you please let me know!
 Font of Choice: I used I used Surf Safari. You can find it here.
 
Let's get started!
 
 Open template
Shift+D to duplicate
Close original
Delete copyright layer
Canvas size 600X600
Replace each layer with paper or element of choice
I used the following:
words 1: adjust to #ecf2f0; inner bevel
words 1 back: adjust to #272823; DS
words 2:adjust to #ddddc4
words 2 back: adjust to #272823; DS
words 3: adjust to #7c9b99; select all, float, defloat & apply Eye Candy 5: glass (watery setting)
words 3 back: adjust to #272823; DS
1: IPD_Shellina_19; resize 35% & DS
2: IPD_Shellina_79; mirror, resize 35% & DS
3: IPD_Shellina_18; mirror, resize 35% & DS
4: IPD_Shellina_Paper3; adjust color to match words 3; apply eye candy gradient glow & DS
5: IPD_Shellina_Paper5; apply eye candy gradient glow & DS
6: IPD_Shellina_Paper4; apply blinds twice (horizontal & vertical); apply eye candy gradient glow & DS
7: IPD_Shellina_Paper7; adjust color to match words 3; apply eye candy gradient glow & DS

(C/P all elements as new layers)
IPD_Shellina_6: resize 35%, duplicate & mirror
IPD_Shellina_39: resize 55%, duplicate & merge down; flip, duplicate, mirror & merge down
IPD_Shellina_80: resize 45%, duplicate, mirror, merge down & resize 90%
IPD_Shellina_58: resize 70%
IPD_Shellina_74: resize 25%
IPD_Shellina_90: resize 25%
IPD_Shellina_70: resize 20%
IPD_Shellina_68: rsize 65%, duplicate & mirror
tube: resize if needed

Add DS where desired

C/P paper of choice as bottom layer
Apply mask & merge

Crop & resize
Add name & copyright
Save as .png & you're done!

I would love to see your results! If you would like to share just send them to me: sherenassweettreats@yahoo.com

Tuesday, July 29, 2014

Back to School FTU Kit

This kit was suppose to be part of a blogtrain, but I never got it posted. To download just click the preview.

https://app.box.com/s/j2q2r8jxuya3tyl0vdwm

If you download, please leave a comment.
 I would love to see anything you make with my kit! If you would like to share just send them to me: sherenassweettreats@yahoo.com

Daisy Girl PTU Tut

Supplies Needed:
PSP: I used PSP9, but any version should do.
 Kit of Choice: I used Peace & Daisies by Scrappin Krazy Designs. You can find where to buy it here.
 Tube of Choice: I used a tube by Caron Vinson. You can find it here. Please do not use without the proper license!
Mask of Choice: I used  Vix_BigMask019. You can find it here.
 Font of Choice: I used I used Xiomara. You can find it here.
 
Let's get started!
 
New canvas 600X600
(C/P all elements as new layers)
ele60- resize 65%
select inside with magic wand
expand by 5
C/P paper of choice (I used p14) under frame layer
invert selection & delete
C/P close up of tube under frame layer
position & delete
deselect
change blend mode & opacity
C/P tube- resize if needed
place on left side of frame
ele46- resize 65%
duplicate & mirror
merge down
duplicate a few times & arrange
ele70- resize 35%
ele20- resize 35%& mirror
ele45- resize 30%
ele02- resize 35% & free rotate right 15
ele21- resize 65% & mirror
duplicate & mirror

Add DS

C/P paper of choice (I used p09)
apply mask & merge
resize 90%
 
Crop & resize
Add name & copyright
Save as .png & you're done!

I would love to see your results! If you would like to share just send them to me: sherenassweettreats@yahoo.com

Tuesday, March 11, 2014

Sweet PTU Tut

Supplies Needed:
PSP: I used PSP9, but any version should do.
 Kit of Choice: I used So Bitter Sweet by Sam's Scraps. You can buy it here.
 Tube of Choice: I used Snow Angel by Verymany. You can  find it here. Please do not use without the proper license!
Mask of Choice: I used WSL_Mask84 here.
  Font of Choice: I used I used Xiomara. You can find it here.
Let's get started!
 New canvas 600X600
C/P 3LH12 - SBS Frame 5
Resize 45%
Select inside with magic wand
Expand by 3
C/P paper of choice under frame layer
(I used 3LH12 - SBS Paper 18)
Invert selection, delete & deselect
C/P closeup tube above paper
Resize if needed & arrange inside frame
Erase any parts showing outside of frame
Change blend mode to Luminance(Legacy) & opacity to 45
DS frame & merge visible
Move to left
C/P tube
Resize if needed (I resized & mirrored mine.)
DS tube

To make the rug:
Select the Ellipse Tool
Mode: Draw Ellipse
Foreground: Null Background: any color
Draw out an oval the size you want your rug
Horizontal center & Convert to Raster
Apply Eye Candy 5:Textures Animal Fur
Settings- Dalmation, Low Coverage
Pattern- Base Color: #ffcddc Spot Color: #ffcddc
Leave everything else the same


C/P elements of choice
I used the following:
3LH12 - SBS chocolates: resize 25%
3LH12 - SBS present: resize 45%
3LH12 - SBS plush bunny: resize 35%
3LH12 - SBS string: resize 45%
3LH12 - SBS flower 8: resize 10%
3LH12 - SBS flower 1: resize 15%; duplicate & mirror
3LH12 - SBS cocktail glass: resize 25%

DS elements

C/P paper of choice (I used 3LH12 - SBS Paper 13.)
Apply mask & merge group
Mirror

Crop & resize
Add name & copyright
Save as .png & you're done!

I would love to see your results! If you would like to share just send them to me: sherenassweettreats@yahoo.com

Wonderland PTU Tut

Supplies Needed:
PSP: I used PSP9, but any version should do.
 Kit of Choice: I used Wonderland by Scrappin Krazy Designs. You can find where to buy it here.
 Tube of Choice: I used a tube by Suzanne Woolcott. She is no longer selling so just use whatever you have. Please do not use without the proper license!
 Font of Choice: I used I used Alice in Wondrland. You can find it here.
 
Let's get started!
 
 New canvas 600X600
C/P ele80
Resize 60%
Select inside with magic wand
Expand by 3
C/P paper of choice below frame layer (I used p18)
Invert selection, delete & deselect
C/P tube
Resize if needed
Duplicate; on duplicate Gaussian Blur 3 & change blend mode to Soft Light
DS original tube
Place at bottom left of frame

C/P elements of choice
I used the following:
ele56-arrange, duplicate & mirror; merge together
ele50
ele116- resize 25%
ele123- resize 45%
ele01- resize 65%; duplicate & mirror
ele104- resize 35%
ele130- resize 35%
ele63- resize 30%
ele25- resize 75%

Add DS where desired

Crop & resize
Add name & copyright
Save as .png & you're done!

I would love to see your results! If you would like to share just send them to me: sherenassweettreats@yahoo.com

Oh So Cute PTU Tut

Supplies Needed:
PSP: I used PSP9, but any version should do.
 Kit of Choice: I used Cutie Kei by Gimptastic Scraps. You can find where to buy it here.
 Tube of Choice: I used the tube that inspired the kit by Cute Loot. You can  find it here. Please do not use without the proper license!
 Font of Choice: I used I used LoveNess Two. You can find it here.
Rug made by me


Let's get started!
 
New canvas 600X600
C/P Frame6
Select inside with magic wand
Expand by 3
C/P paper of choice under frame layer (I used Paper6.)
Invert selection & delete
C/P tube & arrange under frame
Delete & deselect
Change blend mode & opacity
C/P tube
Resize if needed
Mirror & place to left of frame

C/P elements of choice
I used the following:
Rug
Table- resize 45%
Boombox- resize 40%
Tapes- resize 40%
Bag- resize 40%
Sunglasses- resize 40%
StarSwirl- resize 75%; duplicate, flip & mirror
Present- resize 40%
Bear- resize 45%
Halftone- resize 65%; Gaussian Blur 5; Mosaic: Glass Default settings; move below stars

Add DS where desired

Crop & resize

Add name, words & copyright
Save as .png & you're done!

I would love to see your results! If you would like to share just send them to me: sherenassweettreats@yahoo.com

Thursday, February 6, 2014

Be Mine PTU Tut

Supplies Needed:
PSP: I used PSP9, but any version should do.
 Kit of Choice: I used  Be Mine by Mersija's Majestic Design. You can find where to buy it here.She also has a mini kit by the same name.
 Tube of Choice: I used a tube by PinUp Toons. You can  find it here. Please do not use without the proper license!
Mask of Choice: I used Suz heartmask2 here.
 Font of Choice: I used I used Xiomara. You can find it here.
Animation Shop
 
Let's get started!
 
New canvas 600X600
C/P MMD_BeMine_frame2- resize 10%; free rotate left 10
Select inside with magic wand
Expand by 5
Add new layer below frame layer
C/P paper of choice into selection
Deselect
C/P tube
Resize if needed
Erase any parts showing at bottom of frame

C/P elements of choice
I used the following:
MMD_BeMine_flowers bunch1- resize 35%; duplicate & mirror
MMD_BeMine_leaves1- resize 10%; erase the top leaves; duplicate, flip & arrange using raster deform tool; merge down; duplicate & mirror
MMD_BeMine_rose glitter- resize 25%; duplicate & mirror
MMD_BeMine_rose2- resize 7%; duplicate & mirror
MMD_BeMine_candle- resize 10%

Add DS

Add new layer above background layer
Floodfill with color of choice
Add noise
Apply mask & merge group
Resize 85%, duplicate & merge down

Crop & resize
Add name & copyright

To animate:
1. Hide the background & mask layers
2. Merge visible
3. Hide merged layer & unhide background layer
4. Copy merged & paste into Animation Shop (AS)
6. Back in PSP, unhide mask & select
7. Copy & paste as a new animation in AS
8. Paste after current selection so you have 2 mask layers
9. Select frame 1 of the mask layers & insert image transition with these settings:

 
You should now have 6 mask layers
10. On your first animation (mask) Copy & paste after selected frame until you have 6 frames
11. On mask animation, Select All & Copy
12. Back on background animation, Select All & Paste into current selection
13. Back in PSP, hide everything but the top merged layer
14. Copy merged & paste in AS as a new animation
15. Paste after current selection until you have 6 frames
16. Select All & Copy
17. Back on original animation, Select All & Paste into current selection
18. Change frame properties to 20
19. View animation & save

I would love to see your results! If you would like to share just send them to me: sherenassweettreats@yahoo.com

Love is Red PTU Tut

Supplies Needed:
PSP: I used PSP9, but any version should do.
 Kit of Choice: I used  by Scrappin Krazy Designs. You can find where to buy it here.
 Tube of Choice: I used Snow Angel by Verymany. You can  find it here. Please do not use without the proper license!
Mask of Choice: I used WSL_Mask84 here.
 Font of Choice: I used I used Saginaw. You can find it here.
 
Let's get started!
 
New canvas 600X600
C/P ele51 Resize 60%
Select inside with magic wand
Expand by 3
C/P paper of choice (I used p09)
Invert selection, delete & deselect
C/P tube
Resize if needed
I also mirrored mine
C/P closeup under frame
Resize if needed
Erase any parts outside of frame
Change blend mode & opacity

C/P elements of choice
I used the following:
ele18- duplicated a few times & arranged
ele09- resize 35%
ele05- resize 25%
ele50- resize 35% & duplicate
ele37- resize 35%
ele20- resize 25%
ele02- resize 20%

Add DS

C/P paper of choice (I used p13)
Apply mask & merge group
Use Raster Deform tool to adjust
 
Crop & resize
Add name & copyright
Save as .png & you're done!

I would love to see your results! If you would like to share just send them to me: sherenassweettreats@yahoo.com

Wednesday, February 5, 2014

Cupid PTU Tut

Supplies Needed:
PSP: I used PSP9, but any version should do.
 Kit of Choice: I used Candy Hearts Tagger by QueenBrat Designs. You can find it here.
 Tube of Choice: I used a tube that came with the kit. Please do not use without the proper license!
Mask Of Choice: I used Vix-Val2012Mask3 here.
 Font of Choice: I used LoveNess Two here.
(Optional) Eye Candy 5: Textures
 
Let's get started!
 
New canvas 600X600
Select your rectangle tool
Forground: #561265 Background: Null
Line Style: Solid Width: 15
Objects-Align-Center in Canvas
Convert to Raster
Inner Bevel with favorite settings
Select inside frame with magic wand
Expand by 3
C/P paper of choice (I used QBD_CandyHearts_paper19)
Invert Selection, delete & deselect

To make the rug:
Select the Ellipse Tool
Mode: Draw Ellipse
Foreground: Null Background: #b487c2
Draw out an oval the size you want your rug
Horizontal center & Convert to Raster
Apply Eye Candy 5:Textures Animal Fur
Settings- Dalmation, Low Coverage
Pattern- Base Color: #b487c2 Spot Color: #000000
Leave everything else the same

C/P tube Resize if needed

C/P elements of choice
I used the following:
QBD_CandyHearts_ConversationHeartChain01- resize 35%; erase any parts

showing outside of frame
QBD_CandyHearts_Bow04- resize 20%; free rotate left 20
QBD_CandyHearts_CupidsBow01- resize 30%
QBD_CandyHearts_Arrows01- resize 30%
QBD_CandyHearts_BagofArrows01- resize 30%
QBD_CandyHearts_bear02- resize 30%

Add DS

C/P paper of choice (I used )
Apply mask & merge group
Resize 85%

Crop & resize
Add name & copyright
Save as .png & you're done!

I would love to see your results! If you would like to share just send them to me: sherenassweettreats@yahoo.com

Tuesday, February 4, 2014

Tut using January Frost

Tina over at Pink Tadpole's Tags and Tuts made this adorable tag using my FTU January Frost kit. You can find the tut HERE. Thank you Tina!

You can find January Frost HERE.


Friday, January 24, 2014

Crazy Lil Thing PTU Tut

Supplies Needed:
PSP: I used PSP9, but any version should do.
 Kit of Choice: I used My Dotty Valentine by Gimptastic Scraps. You can find where to buy it here.
 Tube of Choice: I used a tube by Ismael Rac. You can  find it here. Please do not use without the proper license!
 Font of Choice: I used I used Sacramento. You can find it here.
 
Let's get started!

New canvas 600X600
C/P Frame1
Resize 65%
Select inside with magic wand
Expand by 3
C/P paper of choice under frame (I used Paper3)
Invert selection, delete & deselect
C/P tube
Resize if needed
DS frame & tube

C/P elements of choice
I used the following:
Love- resize 80% & move to left; duplicate & move to right; merge together
Scatter- resize 75%, duplicate & mirror; merge together
Heart1- flip
Cupid- resize 45% & mirror
Telephone- resize 55%
HeartCandies- resize 35%, duplicate & mirror
Present- resize 45%
Rose- move to left, duplicate & mirror
Lips- resize 45% & add noise

DS elements

Crop & resize
Add name, copyright & words of choice
Save as .png & you're done!

I would love to see your results! If you would like to share just send them to me: sherenassweettreats@yahoo.com

Thursday, January 23, 2014

Madi's Birthday Bash FTU Kit

I have a new kit for you. My baby girl Madison turned 6 on Saturday. So Hard to believe she's already 6! Here is my birthday girl:
Isn't she beautiful!?!

Here is the kit. She chose the colors, elements, papers, everything. Just click the preview to download.
https://app.box.com/s/hbxuqtvc57nv20scs2go
If you download, please leave a comment.
 I would love to see anything you make with my kit! If you would like to share just send them to me: sherenassweettreats@yahoo.com

A Lil Romance PTU Tut

Supplies Needed:
PSP: I used PSP9, but any version should do.
 Kit of Choice: I used A Lil Romance by QueenBrat Designs. You can find it here.
 Tube of Choice: I used a tube by Ismael Rac. You can  find it here. Please do not use without the proper license!
Mask of Choice: I used SST- Mask13 here.
 Font of Choice: I used I used Xiomara. You can find it here.
(Optional)
Animation Shop
Heart Animation here
 
Let's get started!
 
  New canvas 600X600
Select the rectangle tool with theses settings:
Mode: Draw Square
Show Nodes & Create on Vector checked
Horizontal & Vertical Radius: 0
Line Style: +Solid
Width: 15
Anti-Alias checked
Set foreground to color from kit & background null
Center & convert to raster
Add Inner Bevel
Select inside with magic wand
Expand by 5
C/P paper of choice (I used QBD_ALilRomance_paper18)
Invert selection & delete
C/P closeup
Delete & deselect
Adjust blend mode & opacity of tube
C/P tube Resize if needed
Mirror & move to right of frame
I erased the bottom of my tube so she appears to be coming out of the frame

C/P elements of choice
I used the following:
QBD_ALilRomance_frame07- resize 40%
QBD_ALilRomance_pillow01- resize 35%
QBD_ALilRomance_butterfly04- resize 25%
QBD_ALilRomance_flower04- resize 20%
QBD_ALilRomance_flower05- resize 20%
QBD_ALilRomance_flower06- resize 20%
QBD_ALilRomance_flower07- resize 20% & duplicate
QBD_ALilRomance_bow09- resize 35% & free rotate left 20
QBD_ALilRomance_flowerspray02- resize 35%

DS elements & tubes

C/P paper of choice (I used QBD_ALilRomance_paper08)
Apply mask & merge group
Resize 95%

Crop & resize
Add name & copyright
 
 To animate:
Hide everything but mask, frames, paper, closeup & bow
Copy merged & paste as new animation in Animation Shop
Open your animation in AS to see how many frames you need
Mine has 16 frames
On your new animation C/P until you have the same number frames as your animation
Select all
On the animation you are using select all & copy
Back on your animation paste into selection
Back in PSP, hide current layers & unhide everything else
Copy merged & paste in AS as new animation
C/P until you have the same number of frames
Select all & copy
Paste into selection on first animation
View animation & save
 
I would love to see your results! If you would like to share just send them to me: sherenassweettreats@yahoo.com 

Monday, January 13, 2014

Another CT

I joined another Creative Team! I have joined QueenBrat Designs' creative team! Check out her kits by clicking the blinkie below. If you're a kit maker check out her adorable scripts!
QueenBrat Digital Designs

Teacher's Aide PTU Tut

Supplies Needed:
PSP: I used PSP9, but any version should do.
 Kit of Choice: I used Hot & Nerdy by Gimptastic Scraps. You can find where to buy it here.
 Tube of Choice: I used a tube by Ismael Rac. You can  find it here. Please do not use without the proper license!
Mask of Choice: I used Mask27 here.
 Font of Choice: I used I used KBJellybean. You can find it here.
Let's get started!
 New canvas 600X600
C/P Frame3 Resize
Select inside with magic wand
Expand by 3
C/P paper of choice below frame (I used Paper7)
Invert selection & delete
Deselect
C/P closeup tube
Mirror
Erase any parts showing outside of frame
Change blend mode & opacity
C/P tube Resize if needed

C/P elements of choice resizing as needed
I used the following:
TeachersAide
Scatter- duplicated a few times & arrange
Ribbon- mirrored
Protractor
Pencil
Locker
Glasses
CompBook
Chalkboard
Books
Backpack
Apple
Doily

DS tube & elements

C/P paper of choice (I used Paper2)
Apply mask & merge group

Crop & resize
Add name & copyright
Save as .png & you're done!

I would love to see your results! If you would like to share just send them to me: sherenassweettreats@yahoo.com

Anna FTU Tut

Supplies Needed:
PSP: I used PSP9, but any version should do.
 Kit of Choice: I used Anna by CakiePotPie Designs. You can find it here.
 Tube of Choice: I used a tube by Alex_Prihodko. You can  find it here. Please do not use without the proper license!
Mask of Choice: I used WSL_Mask84 here.
 Font of Choice: I used I used Xiomara. You can find it here.
 
Let's get started!
 
New canvas 600X600
C/P CPP_Anna_Frame2
Resize 25% & free rotate right 10
Add new layer below frame
Select all
C/P paper of choice into selection
(I used CPP_Anna_Paper10)
Deselect
Select inside frame with magic wand
Expand by 3
On paper layer invert selection & Delete
Deselect
C/P tube
Resize if needed
C/p tube again
Move below frame & position to one side of tube
Duplicate, mirror & move to other side of tube
Erase any parts of tubes that show below frame
Change blend mode to Luminance(L)

C/P elements of choice
I used the following:
CPP_Anna_Ribbon- resize 12%
CPP_Anna_Flower1- resize 15%
CPP_Anna_Flair- resize 25%
CPP_Anna_Tag3- resize 20%
CPP_Anna_Tag4- resize 20% & free rotate right 10
CPP_Anna_Tag1- resize 20% & free rotate left 10
CPP_Anna_String- resize 20%

Add DS

Add new layer above background layer
Select all
C/P paper of choice into selection
(I used CPP_Anna_Paper6)
Deselect
Apply mask & merge group
Resize 90%
 
Crop & resize
Add name & copyright
Save as .png & you're done!

I would love to see your results! If you would like to share just send them to me: sherenassweettreats@yahoo.com

Friday, January 10, 2014

Boho Chick No Scrap Tut

Supplies Needed:
PSP: I used PSP9, but any version should do.
 Tube of Choice: I used a tube by Cute-Loot. You can  find it here. Please do not use without the proper license!
 Font of Choice: I used Satisfaction. You can find it here.
Animation Shop
MuRa's Meister Copies: Just Google it. It's out there somewhere :)
Xero: Fritillary here

Let's get started!


New canvas 600X273
C/P tube
MuRa's Meister Copies Wallpaper (rotate)
Default settings
Adjust-Blur-Radial Blur
Zoom, Strength:50; Elliptical checked; Horizontal, Vertical & Protect center 0
Duplicate layer & flip
Rectangle Tool Foreground Null, Background any color
Draw out a thin vertical rectangle
Align in center & convert to raster
MuRa's Meister copies Line
Default Settings except change Number to 17
With Selection tool select 7 rectangles on left
Delete & Deselect
Crop merged opaque
Select All-Float Defloat
On top background layer Delete
Add New Layer
Select Selection Borders Both Sides; Anti Alias checked; Border width 3
Floodfill with color of choice
Add Noise- Gaussian; Monochrome checked; 35
Deselect & delete rectangles layer
C/P tube between background layers
Adjust blend mode/opacity (I changed mine to Soft Light)
C/P tube Resize if needed
Mirror & place to left
New layer
Floodfill with same color as before
Select All & contract by 3
Delete & Deselect
Add Noise with same settings as before

Add DS

Add name & copyright

To Animate:
Duplicate bottom background layer twice so you have a total of 3
On top duplicate layer Xero: Fritillary
Granularity-5 Aggression-30 Tesselation-100 Variation-100
On next layer change Variation to 105
On bottom layer change Variation to 110
Copy merged & paste in Animation Shop (AS)
Back in PSP, hide top background layer
Copy merged & paste after current selection in AS
Back in PSP, hide middle background layer
Copy merged & paste after current selection in AS
Select all & adjust frame properties until you're happy with them
View animation & save
 
I would love to see your results! If you would like to share just send them to me: sherenassweettreats@yahoo.com 

Rotate PTU Tut

Supplies Needed:
PSP: I used PSP9, but any version should do.
 Kit of Choice: I used Rotate by Gimptastic Scraps. You can find where to buy it here.
 Tube of Choice: I used the matching tube by KiwiFireStorm. You can  find it here. Please do not use without the proper license!
Mask of Choice: I used Mask16-Leah here.
 Font of Choice: I used I used Digs My Hart. You can find it here.
Animation Shop
 
Let's get started!
 
New canvas 600X600
C/P Frame5
Resize 65% & free rotate left 90
Select inside frames with magic wand
Expand by 3
C/P paper of choice (I used Paper6)
Invert Selection & delete
C/P tube
Position & delete
Deselect
Change blend mode to Luminance(L) & opacity to 65%
C/P tube
Resize if needed & mirror

C/P elements of choice
I used the following:
Cityscape- resize 65%
ZippedHeart- resize 65%
Gun- resize 45% & free rotate left 45
Bullet- resize 25%
Nailpolish- resize 25%
SkullScatter- resize 80%
Skull1- resize 45%
WA- resize 65% & recolor

C/P paper of choice (I used Paper5)
Apply mask & merge group
Resize 90%

Crop & resize now
Add name & copyright

To animate:
1. Hide the background, mask, skullscatter & WA layers
2. Merge visible
3. Hide merged layer & unhide background, mask & skullscatter layers
4. Merge visible
5. Copy merged & paste into Animation Shop (AS)
6. Back in PSP, unhide WA & select
7. Copy & paste as a new animation in AS
8. Paste after current selection so you have 2 WA layers
9. Select frame 1 of the WA layers & insert image transition with these settings:
 
You should now have 6 WA layers
10. On your first animation (mask) Copy & paste after selected frame until you have 6 frames
11. On WA animation, Select All & Copy
12. Back on mask animation, Select All & Paste into current selection
13. Back in PSP, hide everything but the top merged layer
14. Copy merged & paste in AS as a new animation
15. Paste after current selection until you have 6 frames
16. Select All & Copy
17. Back on mask animation, Select All & Paste into current selection
18. Change frame properties to 25
19. View animation & save


I would love to see your results! If you would like to share just send them to me: sherenassweettreats@yahoo.com

Thursday, January 9, 2014

The Best Is Yet to Come PTU Tut

Supplies Needed:
PSP: I used PSP9, but any version should do.
 Kit of Choice: I used  The Best is Yet to Come by Mersija's Majestic Design. You can find where to buy it here.She also has a mini kit by the same name.
 Tube of Choice: I used an exclusive tube from Pics for Design. You can  find it here. Please do not use without the proper license!
Mask of Choice: I used BD Mask Set 6-44 here.
 Font of Choice: I used I used A Gentle Touch. You can find it here.
Plugins: DSB Flux Bright Noise
Animation Shop
 
Let's get started!
 
New canvas 600X600
C/P MMD_TBIYTC_ScallopedFrame
Resize 35%
Select inside frame with magic wand
Expand by 5
C/P paper of choice under frame
(I used LMMD_TBIYTC_paper stars resized 17%)
Invert selection & delete
Deselect
C/P tube
Resize if needed

Add elements of choice
I used the following:
LMMD_TBIYTC_branch teal- resize 15%; duplicate & mirror
LMMD_TBIYTC_branch gold 2- resize 20%; duplicate & mirror
MMD_TBIYTC_NewYearsBox- resize 7%; duplicate & mirror
LMMD_TBIYTC_ flower rose gold- resize 10%
LMMD_TBIYTC_ flower teal- resize 20%; duplicate & mirror
LMMD_TBIYTC_ leaf silver- resize 10% & mirror; duplicate & flip; merge down;

duplicate & mirror

Add DS
Erase any part of tube that shows below elements

Add a new layer above the background layer
Select all
C/P paper of choice into selection
(I used LMMD_TBIYTC_paper)
Deselect
Apply mask & merge group
Resize 90%

Crop & resize
Add copyright & name

To Animate:
1. Select your frame background (Mine is the blue circle)
2. Apply DSB Flux Bright Noise 36 Mix
    Optional: apply to the name also
3. Copy merged & paste into Animation Shop (AS)
4. Back in PSP undo DSB Flux Bright Noise
5. On frame background (& name) apply DSB Flux Bright Noise with the same setting, but click mix once before applying
6. Copy merged & paste after selected frame in AS
7. Repeat steps 4-6
8. View animation & adjust frame properties if needed
    Once you are happy with your animation save

January Frost Kit FTU

I have a new FTU kit for you tonight. I've had it done for a couple of weeks, but I couldn't think of a name. A friend suggested January Frost :) To download just click the preview.
https://app.box.com/s/b8f0h2dticvgxwqjbnhv
Here is a tag I made for a friend using the kit. This Anna Liwanag tube matches perfectly!

If you download, please leave a comment.
 I would love to see anything you make with my kit! If you would like to share just send them to me: sherenassweettreats@yahoo.com

Iced Fantasy PTU Tut

Supplies Needed:
PSP: I used PSP9, but any version should do.
 Kit of Choice: I used Iced Fantasy by Tasha's Playground. You can buy it here.
 Tube of Choice: I used Snow Angel by Verymany. You can  find it here. Please do not use without the proper license!
Mask of Choice: I used DD_AssortedMask_6 here.
  Font of Choice: I used I used Xiomara. You can find it here.
Let's get started!
 New canvas 600X600
C/P frame3
Resize 65%
Select inside with magic wand
Expand by 5
C/P paper of choice below frame
(I used paper6)
Invert selection & delete
C/P closeup tube below frame
Resize if needed
Delete & deselect
Adjust blend mode & opacity
DS closeup tube & frame
Merge visible & move to left
C/P tube
Resize if needed & mirror
C/P fairy wing below tube
Resize 80% & free rotate right 15
Duplicate & Mirror
Arrange so wings look like they are coming out the back of tube
Hide everything but tube & wings
Merge visible & DS

C/P elements of choice
I used the following:
beads- resize 75%
butterfly- resize 45%
bottle- resize 45%
candle- resize 35%
chest- resize 35%
flower3- resize 35%, duplicate & mirror
lantern- resize 45%

Add DS

C/P paper of choice as bottom layer
(I used paper7)
Apply mask & merge group


Crop & resize
Add name & copyright
Save as .png & you're done!

I would love to see your results! If you would like to share just send them to me: sherenassweettreats@yahoo.com

Tuesday, January 7, 2014

My Love PTU Tut

Supplies Needed:
PSP: I used PSP9, but any version should do.
 Kit of Choice: I used My Love by CakiePotPie Designs. You can find where to buy it here.
 Tube of Choice: I used Snow Angel by Verymany. You can  find it here. Please do not use without the proper license!
Mask of Choice: I used WSL_Mask84 here.
 Font of Choice: I used I used Great Vibes. You can find it here.
 
Let's get started!
 
 New canvas 600X600
C/P CPP_ML_Frame
Resize 45%
Select inside frame with magic wand
Expand by 5
C/P paper of choice below frame
(I used CPP_ML_Paper3)
Invert selection & Delete
C/P closeup
Arrange under frame
Delete & Deselect
Adjust blend mode & opacity
C/P tube
Resize if needed

C/P elements of choice
I used the following:
CPP_ML_Chest- resize 35%
CPP_ML_Clock- resize 15%
CPP_ML_Books- resize 35%
CPP_ML_Pillow- resize 35%
CPP_ML_Rose- resize 15%
CPP_ML_Foliage- resize 15%, free rotate right 90 & erase any parts showing to left of rose
CPP_ML_Flower4- resize 25%
CPP_ML_Vine- resize 40% & flip
CPP_ML_Charm- resize 70%

Add DS

C/P paper of choice
(I used CPP_ML_Paper2)
Apply mask & merge group
Resize 90%

Crop & resize
Add name & copyright
Save as .png & you're done!

I would love to see your results! If you would like to share just send them to me: sherenassweettreats@yahoo.com

Winter Angel PTU Tut

Supplies Needed:
PSP: I used PSP9, but any version should do.
 Kit of Choice: I used Winter Angel by Scrappin Krazy Designs. You can find where to buy it here.
 Tube of Choice: I used Snow Angel by Verymany. You can  find it here. Please do not use without the proper license!
Mask of Choice: I used Vix_Mask8Christmas2010 here.
 Font of Choice: I used I used Xiomara. You can find it here.
 
Let's get started!
 
 New canvas 600X600
C/P frame2 as a new layer
Resize 75%
Select inside frame with magic wand
Expand by 5
C/P paper of choice as a new layer under frame
(I used p09 resized 45%)
Invert selection & delete
Deselect
C/P tube
Resize if needed
C/P closeup of tube behind frame
Resize if needed
Erase any parts showing outside of frame
Change blend mode to Luminance(L) & opacity to 65%

C/P elements of choice
I used the following:
angels- resize 45%
flower6- resize 45%
flower2- resize 45%
flower1- resize 45% & duplicate
berries- resize 65%, duplicate & mirror
snowflake1- resize 32% & duplicate 2x
snowflake3- resize 30%; duplicate & resize 75%
 
Add DS

C/P paper of choice
(I used p13)
Apply mask & merge group
Resize 90%
Add noise

Crop & resize
Add name & copyright
Save as .png & you're done!

I would love to see your results! If you would like to share just send them to me: sherenassweettreats@yahoo.com

Angelic Winter PTU Tut

Supplies Needed:
PSP: I used PSP9, but any version should do.
 Kit of Choice: I used Angelic Winter by Mersija's Majestic Design. You can find where to buy it here.
 Tube of Choice: I used the adorable angel that came with the kit.
 Font of Choice: I used I used Xiomara. You can find it here.
Plugins: VDL Snowflake here
Animation Shop
 
Let's get started!
 
 Invert selection & delete
Invert selection DO NOT DESELECT
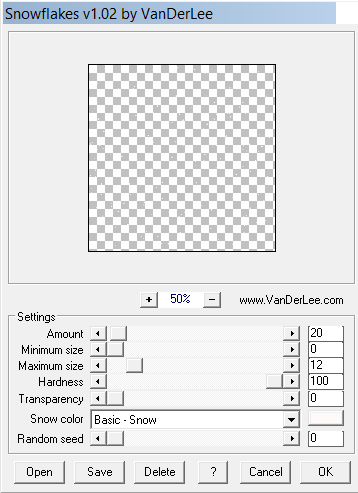
Add 3 new layers above paper layer & name it snow 1, snow 2 & snow 3
On snow 1: VanderLee Snowflakes with these settings:


On snow 2: VanderLee Snowflakes with these settings:
 
 
On snow 3: VanderLee Snowflakes with these settings:
 
Deselect

Add elements of choice
I used the following:
MMD_angel flying (2)- resize 15%
MMD_flower pink gray1- resize 12%; duplicate & resize 80%
MMD_Branch 3- resize 45%; free rotate left 10; duplicate & mirror
MMD_Branch 2- resize 45%; Mirror & free rotate right 10; duplicate & mirror
MMD_cocoa1- resize 6%
MMD_frame- resize 75%

Add DS where desired

Crop & resize
Add name & copyright

To animate:
Hide snow 2 & snow 3
Copy merged & paste in Animation Shop
Back in PSP, hide snow 1 & unhide snow 2
Copy merged & paste after current frame in Animation Shop
Back in PSP, hide snow 2 & unhide snow 3
Copy merged & paste after current frame in Animation Shop
In Animation Shop, select all & change frame properties to 20
View animation & save if happy

I would love to see your results! If you would like to share just send them to me: sherenassweettreats@yahoo.com 

Sunday, January 5, 2014

I joined a CT!

I'm excited to announce I have been asked to join Mersija's Majestic Designs' creative team! Mersija has some adorable kits and even some freebies. Check out her blog here. Be on the lookout for new tuts featuring Mersija's adorable kits!

Wednesday, January 1, 2014

Party Girl PTU Tut

Supplies Needed:
PSP: I used PSP9, but any version should do.
 Kit of Choice: I used 3,2,1...Happy New Year by Scrappin Krazy Designs. You can find where to buy it here.
 Tube of Choice: I used an exclusive tube from Pics for Design. You can  find it here. Please do not use without the proper license!
 Font of Choice: I used I used Xiomara. You can find it here.
   
Let's get started!
 
New canvas 600X600
C/P ele31 Resize 65%
Select inside each frame Expand by 3 & C/P papers of choice behind frames
(I used p04, p05, p10 & p11)
C/P your tube inside each frame Resize if needed
Erase any parts showing outside of frame
Change the blend mode & opacity on each tube
C/P tube to left of frame Resize if needed

C/P elements of choice
I used the following:
ele10- free rotate right 90, duplicate & flip
ele24- resize 45%
ele56- resize 45%
ele46- resize 45%
ele58- resize 45%
ele12- duplicate & flip

Add DS
 
Crop & resize
Add name & copyright
Save as .png & you're done!

I would love to see your results! If you would like to share just send them to me: sherenassweettreats@yahoo.com