Supplies Needed:
PSP: I used PSP9, but any version should do.
Kit of Choice: I used Dead of Night by Gimptastic Scraps. You can find it here.
Tube of Choice: I used a tube by Anna Marine. I got this when she was with CILM. You can now find it at CDO. Please do not use without the proper license!
Mask Of Choice: I used 2nq5ftx here.
Font of Choice: I used Raphael. It is a PTU font.
c/p= copy & paste
ds= drop shadow
Let's get started!
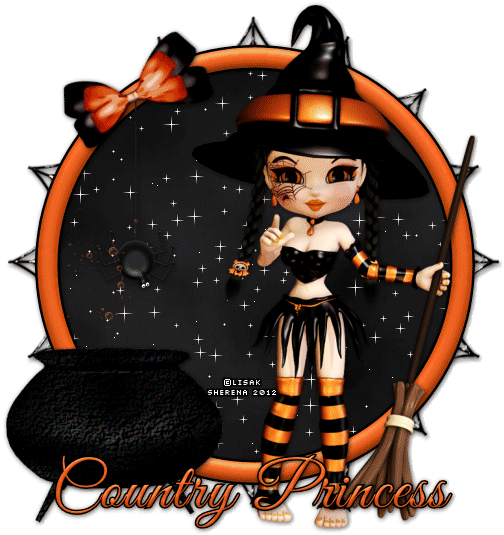
new canvas 600X600
c/p Frame3
resize 65%
c/p paper of choice (I used Paper6.)
resize 65%
select inside frame with magic wand
expand 5
on paper layer- invert & delete
deselect
c/p Moon
resize 35% & move below frame
erase anything showing outside of frame
c/p Necklace
resize 35% & place in center of moon
erase anything showing outside of frame
c/p tombstone
resize 35% & place inside frame
duplicate & resize 80%
Move up & to left
Copy & paste SkullPile
Resize 35% & place inside frame in between tombstones
Copy & paste GhostMan
Resize 45% & place in front of tombstone on right
Adjust- Brightness & Contrast
Set Brightness at 50 & Contrast at 5 to lighten him a little
c/p BlackCat
Resize 45% mirror & place at bottom right side of frame
c/p Tree
resize 65%
move to right side of frame
duplicate & mirror
merge down & move to bottom of layer palette
c/p tube
resize & mirror if needed
c/p any other elements you want
I used the following:
BackRose1- resize 30% duplicate & mirror
Rose- resize 28% duplicate & mirror
Candles- resize 28%
ds desired layers
c/p paper of choice (I used Paper1.)
Apply mask & merge group
resize 90%
crop & resize now if you plan on it
Add name, text & copyright
Save as .png & you're done!
c/p= copy & paste
ds= drop shadow
Let's get started!
new canvas 600X600
c/p Frame3
resize 65%
c/p paper of choice (I used Paper6.)
resize 65%
select inside frame with magic wand
expand 5
on paper layer- invert & delete
deselect
c/p Moon
resize 35% & move below frame
erase anything showing outside of frame
c/p Necklace
resize 35% & place in center of moon
erase anything showing outside of frame
c/p tombstone
resize 35% & place inside frame
duplicate & resize 80%
Move up & to left
Copy & paste SkullPile
Resize 35% & place inside frame in between tombstones
Copy & paste GhostMan
Resize 45% & place in front of tombstone on right
Adjust- Brightness & Contrast
Set Brightness at 50 & Contrast at 5 to lighten him a little
c/p BlackCat
Resize 45% mirror & place at bottom right side of frame
c/p Tree
resize 65%
move to right side of frame
duplicate & mirror
merge down & move to bottom of layer palette
c/p tube
resize & mirror if needed
c/p any other elements you want
I used the following:
BackRose1- resize 30% duplicate & mirror
Rose- resize 28% duplicate & mirror
Candles- resize 28%
ds desired layers
c/p paper of choice (I used Paper1.)
Apply mask & merge group
resize 90%
crop & resize now if you plan on it
Add name, text & copyright
Save as .png & you're done!
I would love to see your results! If you would like to share just send them to me: sherenassweettreats@yahoo.com
Let's get